Terraform on Azure DevOps, Day 1: First UK South Deploy with Secure State
I’ve wanted to write something for a while around Terraform and how I’d go about setting it up from scratch. I’ve done it a few times but always forgotten a step or two and had to click about to get it working. To stop that from happening again and to share my insights and experience with you all I’m putting together a terraform mini series on how to setup terraform with Azure Devops to manage Microsoft products. I’m going to be using this as a test environment to try and manage Intune configurations and Power Platform infrastructure as well as the Azure stack.
I’ve written this series to make it scalable for multiple environments and considered some of the lessons I’ve learned from using Terraform and building a repository one way only to then have to refactor it later.
Series goal: Stand up a practical, multi‑environment Terraform platform on Azure DevOps (with split pipelines for Infra/Entra/MS Graph), using secure auth, remote state, and reusable modules—scaling from Dev to Prod.
What you’ll build today
- A new Azure DevOps repo (codebase) and a working pipeline that authenticates to Azure using Workload Identity Federation (OIDC) - no client secrets to rotate.
- Terraform remote state in Azure Storage with locking, authenticated via Azure AD/OIDC.
- A minimal infrastructure composition in UK South:
- Resource Group
- Virtual Network + Subnet
- (Optional “go further”) a small B1s VM attached to the subnet
- Notes on extending to UK West for resilience later.
For a look at all the code we will be building, check out https://github.com/mdlister/TerraformMiniSeries I’ve published where you’ll find all the code if you aren’t following along.
Why these choices?
- Workload Identity Federation is now the recommended way to connect Azure DevOps pipelines to Azure—federated credentials remove long‑lived secrets and their renewals.
- Terraform’s azurerm backend stores state in Azure Blob Storage, supports state locking, and can authenticate using Azure AD/OIDC (no account keys or SAS required).
Prerequisites
- An Azure subscription and permissions to create resources and role assignments.
- An Azure DevOps organisation and project.
Naming: I’ll follow Microsoft’s Cloud Adoption Framework (CAF) style and keep names short and descriptive (for example, rg-core-dev-uks, sttfstateprod001). If you’re new to CAF naming, skim the guidance and examples for consistency across resource types. Cloud Adoption Framework
Step 1 — Create state storage (one‑time bootstrap)
Terraform’s backend must exist before the first pipeline run. We’ll create a resource group, a storage account, and a private blob container in Azure first. (region: UK South).
You can run these in Azure Cloud Shell or locally with Azure CLI. Or if you prefer to use the portal you can create the resources manually.
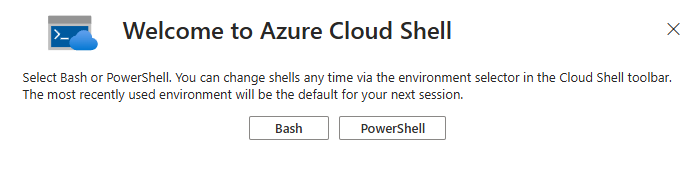
Navigate to https://portal.azure.com/ and click the cloud shell icon in the ribbon across the top. This will open the Cloud shell, and if its the first time you open this you will be prompted for a language.
I’ve opted for Bash
You’ll need to select a subscription for a storage account to be created for Cloudshell to store temporary code.
# variables (adjust to taste)
RG_STATE="rg-tfstate-core-uks"
LOC="uksouth"
SA_NAME="sttfstate$RANDOM"   # must be globally unique, 3-24 lower-case letters/numbers
CONTAINER="tfstate"
create RG, storage, and container
az group create -n $RG_STATE -l $LOC
az storage account create -g $RG_STATE -n $SA_NAME -l $LOC --sku Standard_LRS --encryption-services blob
az storage container create --name $CONTAINER --account-name $SA_NAME
Now you should be able to see the Resource Group, Storage Account and Container for the Statefile.


- Azure Storage is a supported backend for Terraform and provides state locking via blob leases.
- We’ll authenticate to blob data plane via EntraID (Azure AD). Later, we’ll assign our pipeline identity the Storage Blob Data Contributor role so it can read/write the state file.
Tip: Keep this “tfstate” storage minimal and locked down. We’ll import it into Terraform in Day 6 to get everything under code management.
Step 2 — Create an Azure DevOps ARM Service Connection (WIF)
We’ll set up an Azure Resource Manager service connection using Workload Identity Federation. This lets Azure DevOps exchange a short‑lived OIDC token for Azure access—no secrets.
In Azure DevOps (Project Settings → Service connections):
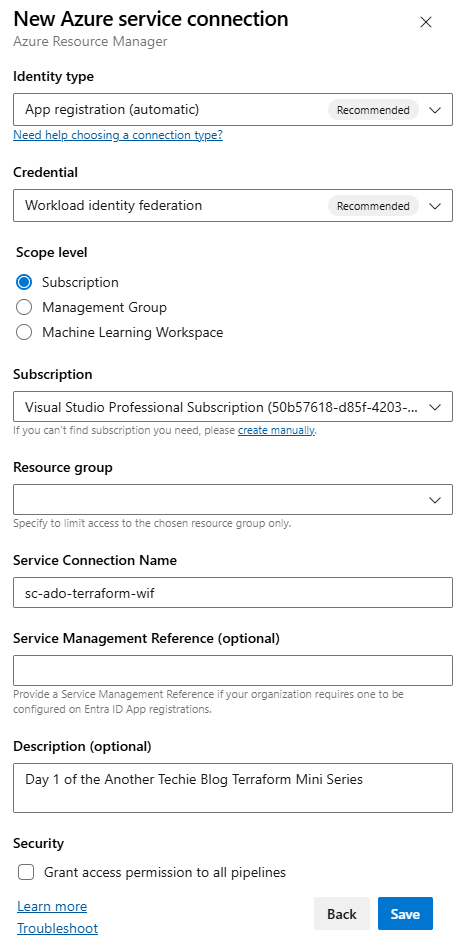
- New service connection → Azure Resource Manager.
- Choose Workload identity federation (automatic if available; otherwise use manual and follow the steps to add a federated credential to your Entra app). The UI rollout varies—you may still see the older experience.
- Scope it to your subscription (or RG) and give it a friendly name, e.g. sc-ado-terraform-wif.
I haven’t scoped my connection to a resource group, this means that this service connection will have access to all the resources within the Subscription where I assign permissions.
As the pipeline will be running using this Workload Identity, I want it to be able to create resources within the Subscription and multiple Resource Groups going forward.
After clicking Save, you will be presented with a summary of your service connection.
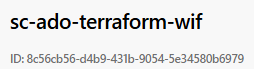
I copied this guid and checked EntraID by pasting the GUID in to the search box and it returned the enterprise app registration. Then in the Azure Portal, within the Subscription > Access Control (IAM) and I added the account to the contributor role to allow this Workload Identity to create and manage resources within the Azure Subscription.
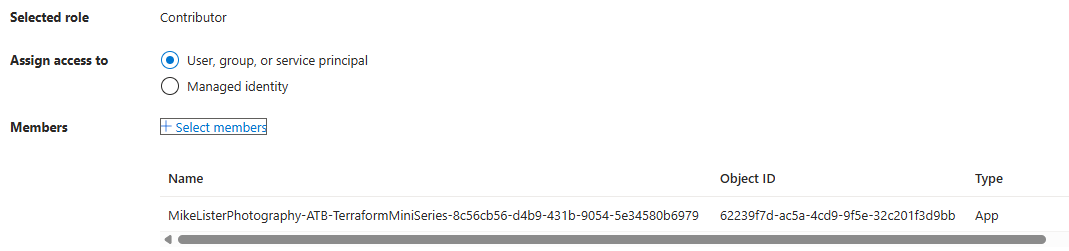
Access - Don’t forget
Role assignments your pipeline identity needs:
- At subscription (or target RG) level, a role that can create what you plan to deploy (start with Contributor, refine later).
- On the state Storage Account (or its container), grant Storage Blob Data Contributor so Terraform’s backend can read/write the .tfstate blob via AAD.
Step 3 — Repo structure
Clone your empty repo and create the following directories and files a codebase/ folder with modules and a dev environment.
From DevOps, click Repo then clone in VS Code
/azure-pipelines.yml
/codebase
  /modules
    /azure
      /resource-group
        main.tf
        variables.tf
        outputs.tf
      /network
        main.tf
        variables.tf
        outputs.tf
      /compute                # optional for Day 1 (Linux B1s demo)
        main.tf
        variables.tf
        outputs.tf
  /env
    /dev
      main.tf
      providers.tf
      backend.tf
      dev.tfvars
once this is done, commit the code back to the repository either via command line or using the Visual Studio Code GUI
git add .
git commit -m "Created Scaffold"
git push
Step 4 — Terraform code (modules + dev environment)
4.1 Provider and backend (env/dev)
Paste the code in to each of the files, ignore the errors if VSCode is highlighting any as its checking code when it hasn’t been fully populated.
/codebase/env/dev/providers.tf
terraform {
  required_version = ">= 1.5.0"
  required_providers {
    azurerm = {
      source  = "hashicorp/azurerm"
      version = "~> 4.0"
    }
  }
}

provider "azurerm" {
  features {}
  # (Optional) Avoid auto-registration if the pipeline identity lacks permissions:
  # resource_provider_registrations = "none"
}
/codebase/env/dev/backend.tf
(Use the Storage you created in Step 1. We enable AAD authentication for the data plane.)
terraform {
  backend "azurerm" {
    resource_group_name  = "rg-tfstate-core-uks"
    storage_account_name = "sttfstate12345"     # <- change to your SA name
    container_name       = "tfstate"
    key                  = "dev/infra.tfstate"
    use_azuread_auth     = true                 # AAD/OIDC auth to the blob data plane
  }
}
The azurerm backend supports AAD/OIDC authentication (use_azuread_auth = true) and provides state locking via Azure Blob’s native capabilities.
Environment composition (env/dev)
/codebase/env/dev/main.tf
variable "location" {
  type        = string
  description = "Azure region for resources"
  default     = "UK South"
}
variable "name_prefix" {
  type        = string
  description = "Prefix for resource names (CAF-style short names are fine)"
  default     = "core-dev-uks"
}
module "rg" {
  source   = "../../modules/azure/resource-group"
  rg_name  = "rg-${var.name_prefix}"
  location = var.location
}
module "network" {
  source              = "../../modules/azure/network"
  location            = var.location
  rg_name             = module.rg.name
  vnet_name           = "vnet-${var.name_prefix}"
  address_space       = ["10.10.0.0/16"]
  subnet_name         = "snet-main"
  subnet_address_pref = "10.10.1.0/24"
}
# --- Optional (Go further) small VM ---
# module "compute" {
#   source              = "../../modules/azure/compute"
#   location            = var.location
#   rg_name             = module.rg.name
#   vnet_name           = module.network.vnet_name
#   subnet_name         = module.network.subnet_name
#   vm_name             = "vm-${var.name_prefix}"
#   vm_sku              = "Standard_B1s"
# }
/codebase/env/dev/dev.tfvars
location    = "UK South"
name_prefix = "core-dev-uks"
4.3 Resource Group module
/codebase/modules/azure/resource-group/variables.tf
variable "rg_name"  { type = string }
variable "location" { type = string }
/codebase/modules/azure/resource-group/main.tf
resource "azurerm_resource_group" "this" {
  name     = var.rg_name
  location = var.location
  tags = {
    env = "dev"
  }
}
/codebase/modules/azure/resource-group/outputs.tf
output "name"     { value = azurerm_resource_group.this.name }
output "location" { value = azurerm_resource_group.this.location }
4.4 Network module
/codebase/modules/azure/network/variables.tf
variable "rg_name"             { type = string }
variable "location"            { type = string }
variable "vnet_name"           { type = string }
variable "address_space"       { type = list(string) }
variable "subnet_name"         { type = string }
variable "subnet_address_pref" { type = string }
/codebase/modules/azure/network/main.tf
resource "azurerm_virtual_network" "this" {
  name                = var.vnet_name
  location            = var.location
  resource_group_name = var.rg_name
  address_space       = var.address_space
}

resource "azurerm_subnet" "this" {
  name                 = var.subnet_name
  resource_group_name  = var.rg_name
  virtual_network_name = azurerm_virtual_network.this.name
  address_prefixes     = [var.subnet_address_pref]
}
/codebase/modules/azure/network/outputs.tf
output "vnet_name"   { value = azurerm_virtual_network.this.name }
output "subnet_name" { value = azurerm_subnet.this.name }
4.5 (Optional) Compute module (Linux VM, B1s)
To keep Day 1 focused, I’ll just provide the outline. You can drop this in and enable the module “compute” block later:
/codebase/modules/azure/compute/variables.tf
variable "rg_name"     { type = string }
variable "location"    { type = string }
variable "vnet_name"   { type = string }
variable "subnet_name" { type = string }
variable "vm_name"     { type = string }
variable "vm_sku"      { type = string }
/codebase/modules/azure/compute/main.tf
data "azurerm_subnet" "target" {
  name                 = var.subnet_name
  virtual_network_name = var.vnet_name
  resource_group_name  = var.rg_name
}

resource "azurerm_network_interface" "nic" {
  name                = "${var.vm_name}-nic"
  location            = var.location
  resource_group_name = var.rg_name

  ip_configuration {
    name                          = "ipconfig1"
    subnet_id                     = data.azurerm_subnet.target.id
    private_ip_address_allocation = "Dynamic"
  }
}

resource "azurerm_linux_virtual_machine" "vm" {
  name                = var.vm_name
  resource_group_name = var.rg_name
  location            = var.location
  size                = var.vm_sku
  admin_username      = "azureuser"

  network_interface_ids = [azurerm_network_interface.nic.id]

  admin_ssh_key {
    username   = "azureuser"
    public_key = "ssh-rsa AAAA...replace-with-your-key"
  }

  source_image_reference {
    publisher = "Canonical"
    offer     = "0001-com-ubuntu-server-jammy"
    sku       = "22_04-lts"
    version   = "latest"
  }

  os_disk {
    name                 = "${var.vm_name}-os"
    caching              = "ReadWrite"
    storage_account_type = "Standard_LRS"
  }
}
Step 5 — Pipeline YAML (Azure DevOps)
Create azure-pipelines.yml at the repo root. This uses the Microsoft Terraform tasks extension to install Terraform and run init/plan/apply, and authenticates via your WIF service connection. (The extension is maintained on GitHub.)
Service connection name: replace sc-ado-terraform-wif with yours.
# azure-pipelines.yml
trigger:
  branches:
    include: [ main ]
  paths:
    include: [ codebase/**, azure-pipelines.yml ]

pool:
  vmImage: ubuntu-latest

variables:
- name: envName
  value: dev

- group: tf-dev

stages:
- stage: Validate
  jobs:
  - job: validate
    steps:
    - task: TerraformInstaller@1
      displayName: Install Terraform (latest)
      inputs:
        terraformVersion: latest

    # Keep validation backend-less
    - script: |
        terraform -chdir=codebase/env/$(envName) init -backend=false
        terraform -chdir=codebase/env/$(envName) fmt -check -recursive
        terraform -chdir=codebase/env/$(envName) validate
      displayName: terraform fmt & validate

- stage: PlanApply
  jobs:
  - job: plan_apply
    steps:
    - task: TerraformInstaller@1
      displayName: Install Terraform (latest)
      inputs:
        terraformVersion: latest

    # INIT with AzureRM backend + OIDC
    - task: TerraformTask@5
      displayName: terraform init (azurerm backend + OIDC)
      inputs:
        command: init
        provider: 'azurerm'
        workingDirectory: codebase/env/$(envName)
        backendType: azurerm
        backendAzureRmUseEntraIdForAuthentication: false
        backendAzureRmUseCliFlagsForAuthentication: true
        backendServiceArm: 'sc-ado-terraform-wif'
        backendAzureRmResourceGroupName: $(tfstateRg)
        backendAzureRmStorageAccountName: $(tfstateSa)
        backendAzureRmContainerName: $(tfstateContainer)
        backendAzureRmKey: $(tfstateKey)

    # PLAN with OIDC
    - task: TerraformTask@5
      displayName: terraform plan
      inputs:
        command: plan
        workingDirectory: codebase/env/$(envName)
        environmentServiceNameAzureRM: 'sc-ado-terraform-wif'

    # APPLY with OIDC
    - task: TerraformTask@5
      displayName: terraform apply
      inputs:
        command: apply
        commandOptions: >
          -auto-approve
        environmentServiceNameAzureRM: 'sc-ado-terraform-wif'
        workingDirectory: codebase/env/$(envName)
The azurerm backend authenticates to the blob data plane using AAD/OIDC (we set use_azuread_auth = true in backend.tf). Ensure the pipeline identity has Storage Blob Data Contributor on the storage account (or container), otherwise init will fail to read/write state.
Before we can run this we also need to create DevOps Library variable Group. I prefer this to hardcoding the values in the pipeline.
Within DevOps, Select Pipelines > Library > Create Variable Group and call it tf-dev as we defined that within the variables in the pipeline as a group.
we then need to create the following key pair values:
- tfstaterg: rg-tfstate-core-uks
- tfstatesa: sttfstate9683 # <– change to your SA name
- tfstatecontainer: tfstate
- tfstatekey: ‘$(envName)/infra.tfstate’
- tenantid: ######-Your Azure Tenant ID-####### # <– change to your tenant ID
- subscriptionId: ####-####-#####-#####-##### # <– change to your Subscription ID
Then click save
Step 6 — Run it and verify
Another issue I found whilst doing this, you need to have the Azure Pipelines Terraform Tasks marketplace add-on installed in your DevOps organisation. It’s free but provides the TerraformCLI components to allow the Workload Identity to work correctly.
- Commit and push.
- We need to create our pipeline now.
- Navigate back to DevOps and click Pipelines
- Click Create Pipeline
- Select Azure Repos Git YAML
- Select the Repo where the azure-pipelines.yml file lives and then click Run.
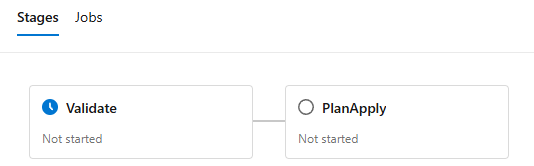
- Watch the pipeline: Validate → PlanApply.
- In Azure Portal, check:
- Resource group rg-core-dev-uks
- VNet vnet-core-dev-uks with subnet snet-main
- (If enabled) VM vm-core-dev-uks
- Storage container tfstate with blob dev/infra.tfstate (you’ll also see lease locks during runs). Terraform state locking is provided by Azure Blob’s native capabilities.
Then it will start after you approve it to connect to Azure

It’s taken me 4 hours to troubleshoot why it wouldn’t work with the OIDC authentication thats “recommended”.
The Terraform tasks need to be on V5 and some other bits in the pipeline that i’ve now fixed, cleaned up the pipeline and got a successful build.
UK West note (resilience)
We’ll keep UK South as default. When you want to explore resilience later, add ukwest as a secondary in your tfvars or as a second environment and wire a second VNet/peering—or model active/standby. (We’ll cover multi‑environment patterns and promotions in later days.)
Troubleshooting
- terraform init fails with auth to the backend
- Make sure the pipeline identity (your WIF service connection principal) has Storage Blob Data Contributor on the tfstate storage account/container—AAD is used to access the blob data plane when use_azuread_auth = true.
- Don’t see the “Workload identity federation” option?
- Microsoft is rolling out the new experience; follow the manual WIF steps in the doc (add federated credentials to your app registration, then finish the service connection).
- Provider permissions/resource provider registration
- The AzureRM provider may try to auto‑register resource providers; if your identity can’t, set resource_provider_registrations = “none” in the provider block.
What’s next (Day 2)
We’ll finish the platform plumbing:
- Secure Key Vault and link it to an Azure DevOps Variable Group so pipelines fetch the latest secret values at runtime (even for future lessons that need secrets).
- Add finer RBAC and explain why WIF means “no more expiring secrets” in pipelines.